4 Google Adwords Presets you should check to reduce your CPA


Google AdWords is packed with features to help you optimise and expand the reach of your campaigns. By default lots of these features are switched on. It depends on the circumstances but it's likely that lots of these might be decreasing the performance of your campaigns.
Here's our top four presets that should be looked at from time to time to understand how they are performing, and in case their being harmful, tweak.
Search Partners
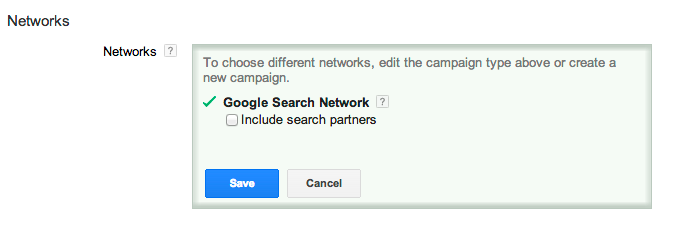
Situation : When you create a Search campaign you will automatically be opted in to Google's search partners. This may reduce your overall CTR, hence quality score leading to increasing costs.
First thing you want to do is understand if this has been good or bad for business:
- Select the Period you want to analyse (last 90 days might be good place to start, but depends on the seasonality of your business).
- Select the Campaigns tab.
- Click Segment and choose by Network.
- This will show you the breakdown of clicks, CTR, Av CPC, cost, Conversions, etc.. by Network (Search, Search Partners,…).

Assuming you have setup a default search campaign you will be able to compare the above metrics between Search and Search Partners and draw your own conclusions. By experience search partners will show lower results in most if not all of the specified metrics. If this is the case:
- Select the campaign you want to change.
- Select the Setting tab.
- Under Network and edit the Networks section.
- Untick include search partners.
You may want to create a separate campaign with Google and Google Search partners enabled to pick up that additional volume whilst keeping your high quality campaign separate.
Location Targeting
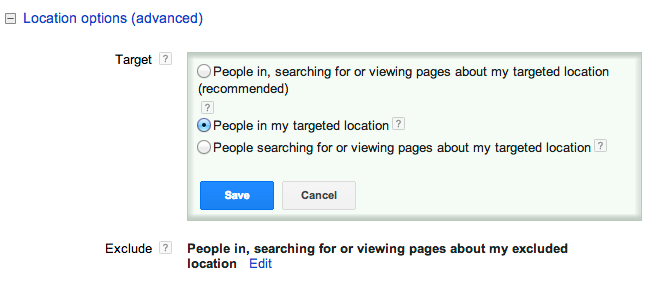
Situation : When you setup a new campaigns you usually get the default Location selection for your account, which usually corresponds to your home country. Most people think this will make only people in that physical location to see your ads. However the default Google selection is that : people in, but also searching for or viewing pages about the targeted location will see this page.
Once again you will need to understand if this has been harming you:
- Select the Period you want to analyse (last 90 days might be good place to start, but depends on the seasonality of your business).
- Select the Dimensions tab.
- View User Locations (This will show you where are the clicks and conversions coming from).

You will normally have a small amount of clicks coming from outside the physical location you specified, but slowly can add up in costs to a big number, which is specially critical for businesses with a small budget. To change this:
- Select the campaign you want to change.
- Select the Setting tab.
- Under Location options (advanced) and edit the Target section.
- Select people in my targeted location.
Device
Situation : When you create a campaign bidding will be the same for all devices.
If you have a preferential target (like mobile apps have mobile phones, or local restaurants need people out and about) you should definitely bid more on those specific platforms.
To check your current device bidding situation go to:
- Select the settings tab.
- Choose Devices in the 2nd row.
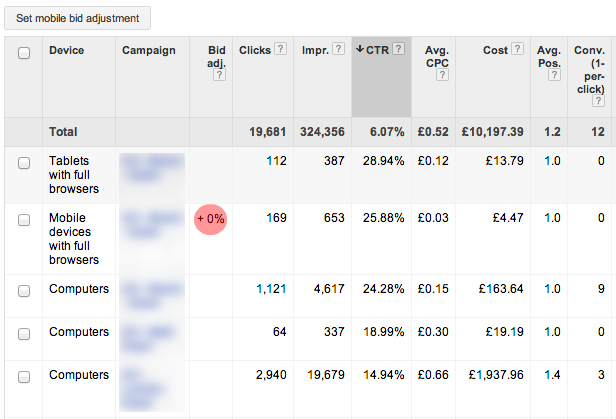
- Under Bid Adj. see what campaigns are giving preference to Mobile or Tablets/Desktop.
- Either visually analyse/correlate the Clicks and or Conv. column(s) and device (or download this data to analyse in Excel).
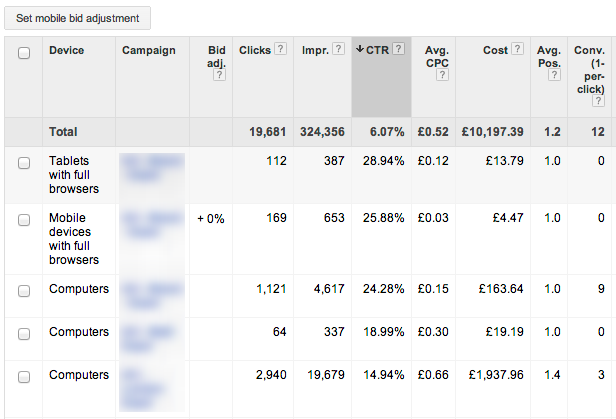
If you notice a considerable amount of conversions and/or clicks (or even CTR/Conv % - depending on your objectives) from a particular device you should try increasing bids on this platform.
Under the same screen and bid adj. column click the 0% to change it to either a positive percentage or a negative one (-100% means you don't want that campaign to use that platform)
Ad Schedule
Situation : When you create a campaign you will have ads running 24/7
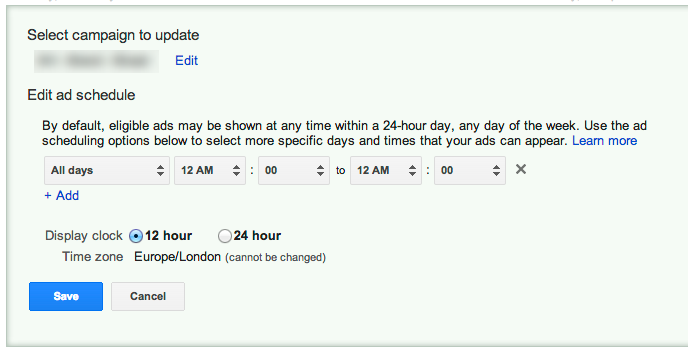
The same way you can find correlation's between device and number of clicks or conversions you can do the same with hours of day or days of the week. In case you really need to cut spending, have an offline / e-commerce shop that only delivers from 9-6pm or handle all deals over the phone during a day of the week you don't have to have ads running 24/7.
To check your current ad schedule situation go to:
- Select the settings tab.
- Choose Ad schedule in the 2nd row.
- Look at the table and if it's empty it is using the default 24/7 settings.

To understand if there is a correlation:
- Go to the Dimensions tab.
- Either visually analyse/correlate the Clicks and or Conv. column(s) and View per Day of week or Hour of day (or download this data to analyse in Excel).
If you notice a considerable amount of conversions and or clicks (depending on your objectives) from a particular period of time and even 0 in others you could try tweaking your ad schedule to correspond to this. However, remember that your customers might search for your business, not purchase then come back later. If possible test the effect of different scheduling options.
To do this simply follow these steps:
- Select the settings tab.
- Choose Ad schedule in the 2nd row.
- Click Edit ad schedule.
- Select the campaign where you found correlations between time/day and clicks and or conversions.
- Click create custom schedule.
- Pick the days or hours to be active.
- Save.
